Showing posts with label camcorder. Show all posts

Saturday, May 2, 2009

The HV30 White Balance, Part 2

Okay, now the histograms for our white balance experiment. The first four look similar in the red, green, and blue channels, but there is a significant difference in the luminance (black graph) channel, with more spikes for the Custom white balance setting (unsurprising given it responds to whatever you put in the lens while setting it). It is different from the fully-automated setting, but the spikes are in the same neighbourhood, as is the bump to the left of the spikes.

The two fluorescent settings differ in the luminance channel more than they do in the 3 colour channels. This makes sense as the fluorescent-corrected is intended for lights shifted from the greens of regular fluorescent lights (measured as 4100-4400 K colour temperature) towards the bluer temperature of sunlight (5000-6500 K). Shooting in real daylight creates one spike (or 3 shoved together?) for the daylight-corrected setting, but 3 distinct spikes for the conventional fluorescent setting.
Looking at the actually Daylight setting, it resembles the fluorescent setting in terms of the luminance, and not the corrected one. Interesting, and not what I expected.

The Shade setting pushes the 3 spikes of the Daylight setting together, with nearly identical colour channel readings for both. The Cloudy setting, by comparison, has luminance spikes somewhere between Daylight and Shade, which makes sense.
Finally, the tungsten setting, which is designed for the 3000K colour temperature of the halogen incandescent bulb (I’m guessing the 2700K average for conventional incandescent are probably okay with this setting, too). I’ve grouped it with the two fluorescent settings (which I’ve misspelled, perhaps reflecting my past work in the restaurant business…) to see what the 3 artificial light settings do.


As the screen cap from last time shows, this setting spikes in the blue channel farther to the right than the other settings. The three green channels are quite similar, but the tungsten setting pushes the red channel towards the dark side—not surprising given the light bulb gives off a distinct orange-yellow glow and tends to tint everything towards the red. The luminance graph is different, too, with that ragged, wide spike in the bright end of the scale—I’m guessing the heavy shift in the blue channel means the luminance spike moves over, too.


Based on this third histogram comparison, I’d say that the more corrective the white balance setting, the more spikes and shifts in the luminance and colour graphs. The Tungsten and Fluorescent settings correct strong red and green shifts, respectively, by changing the image much more than what we see in the three natural light settings and the daylight-corrected fluorescent settings.

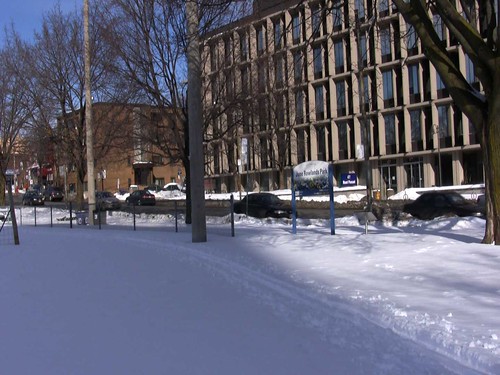
The most detailed histogram is the custom setting, which I had set by zooming into an area of virgin snow and pressing the white balance button to set the camcorder. Going forward, I’ll carry a grey card (backed with a white card) with me in order to manually set the white balance, relying upon the presets only when I forget the card or it’s not practical to shoot one in advance (such as when I shoot a stage show and don’t have the opportunity to set up properly).

Tuesday, April 28, 2009

The HV30 White Balance, Part 1

The next part of the HV30 tour is the white balance settings. There are a number of presets as well as a manual setting. For these tests, the HV30 was in 1080 60i mode, with the Cine Look since I think it will be one of the more frequent settings I use.


First up, the automatic white balance. I’m guessing the camcorder looks around for the whitest-looking pixels and picks them to represent what white should be. Here, the snow in the park hands the camcorder an easy one.

The snow looks somewhat grey in the sunlight—only the snow across the road in front of the building looks white. Let’s see what the daylight setting does:
The snow is whiter in this shot, so I’ll avoid the automatic setting, at least on sunny days.

Next, the cloudy setting. The sky on the day of the shoot was clear and bright, so this is not the setting’s best test:

Next, we get into the Shade setting. I assume this setting works to level out contrasts between things in shadow and any hotspots in the same frame?


Leaving natural light settings, we get into the white balance settings for artificial light. First up, the tungsten setting, probably the worst to use in daylight since it’s looking for a much cooler light temperature:
Yup, that’s definitely the wrong setting. Nothing that colour correction in post couldn’t fix, but I’ll bet the reds and greens are probably not as vibrant. We’ll see with the histogram next time.

Next on the bulb part of the tour is the normal fluorescent bulb setting:
This isn’t that bad at first glance—certainly a bit darker, but it’s not blue like the tungsten setting, and the brown building still looks brown. The histogram will tell the tale.

Next is the daylight-balanced fluorescent setting:
This looks less blue than the normal fluorescent setting. The histogram comparison should be fun!

Finally, we get to the custom setting, or the manual white balance. In order to ensure that the framing was identical to the other white balance settings, I didn’t zoom into the sunlit snow to get an accurate white balance as I would normally do, so the white balance in this clip is based on the entire frame you see here:
This doesn’t look too bad—the whites look white, the blues look blue, and the browns look brown. The histogram will tell the tale.

That concludes the white balance comparison for this week. Next week, the long-anticipated histograms of these shots, just to see just how the colour balance changes from setting to setting.

Monday, April 13, 2009

The HV30 Special Scene Recording Programs, Part 2


Okay, here, finally, are the histograms for the special recording programs. Aside from the Fireworks mode, I can see two distinct patterns emerge.
The Beach and Snow programs have two spikes towards the bright (right) side of the graphs for all four channels. The dark (left) side is diminished in comparison to the other programs' histograms, so it's obvious these two programs shift the entire image to the bright side.
On the other hand, the Night, Portrait, Sports, Spotlight, and Sunset histograms look fairly similar: a bump on the left-third of the graph, two or more spikes in the middle, and a somewhat empty right-hand side.
Clearly, I need to do more testing of these programs to see how they work in other situations!

Next time, I'll take a look at the white balance settings.

Tuesday, February 24, 2009

The HV30 Special Scene Recording Programs, Part 1

My tour of the HV30 continues!

The HV30 comes loaded with a whole bunch of presets for typical situations that someone might come across while shooting. There are eight settings (Portrait, Snow, Sports, Spotlight, Beach, Night, Sunset, and Fireworks), and I shot footage with the HV30 in 1080 60i mode, shooting just 10 seconds per setting in order to minimize the shifting sun (directly behind the camera).


First up, the Snow Mode, just because I’m shooting a snowy field. As seen above, the image looks pretty good, with what appears to be balanced colour. The snow in the sunlight looks blown out, though.

The snow in shadow and in the sunlight halfway up on the left doesn’t look blown out, nor does the park sign just right of centre. Something with this setting doesn’t like a mix of shadow and light, even if it’s snow. The tree shadow in the lower right has a slight tint to it—somewhat magenta? That would mean the red and blue is cranked up or the green channel is cut. I’m definitely interested in seeing the histograms for this series of test images!


Next, the Beach Mode:


First thing I noticed was that the shadow of a bare tree (lower right) has lost the magenta the Snow Mode gave it, but the detail is about the same. The broken snow in the lower right is not defined very well—it looks blown out like in Snow Mode. The red channel is definitely subdued here—look at the brick building and the concrete pole on the left side of the image and the office building across the road.

Our third setting of the day is the Night mode. Shooting a snowy field on a bright winter’s day is probably not the best way to test this setting, but I was interested by the differences with this mode compared to Snow and Beach:


Looks darker overall, but I think that’s what anyone would expect. What is interesting is that the broken snow on the lower right is sharp and not blown out. The brick building and the concrete pole have more red to them like the Snow mode compared to the Beach mode, so at this point I’m thinking the Beach mode must chop the red channel down compared to Snow and Night. Good to know!

Next, the Portrait mode. Designed for making people look good in close-ups, probably by doing something with the red channel, here’s what it does with a snow-covered park:


Like the Night mode, this is not the best subject to shoot with this mode. The image is dark, but the broken snow is not blown out, and the brick building and concrete pole don’t seem to have lost any of the red as in the Beach setting. I was struck by how similar this image was to the Night mode image—I had to go back and make sure I hadn’t used the same image twice by mistake. When I do another round of tests, I’ll have to find a better subject to fully understand how the Portrait Mode affects the HV30’s performance.

Next, the Sports Mode. My first guess was that this mode would speed up the shutter speed to better capture fast action, but I have a TV with a sports setting that shifts the colour balance away from the red channel (the TV’s movie setting definitely warms up and image by shifting towards the red).


Here’s what the Sports Mode did with my snowy park. It resembles the Portrait and the Night Modes. The broken snow is not blown out, and the image is darker overall. The red in the brick building and the concrete pole doesn’t look altered at all (a red car happened to pass through and other than being dark, it looks red).

Next, the Spotlight mode. Interesting to see how it compensates for the dark and light areas in the frame—it seems to darken everything equally:


The dark is definitely darker, and the lighter areas are definitely darker, too, so this is clearly the wrong setting to use in this type of situation. I’m looking forward to comparing the histograms for the last 3 modes, just to see what the differences are.

Next, I fired up the Sunset Mode (which I assume could be used for sunrises, too?).


It looks like it’s somewhere in the middle of the pack. The broken snow is still sharp, and the red channel doesn’t look suppressed, but it’s a brighter image.

Finally, my favourite of these tests: the Fireworks mode. Not surprisingly, a snow-covered park doesn’t work with this image at all. I captured a perfectly white image:


I never suspected changing the recording program on the HV30 would crack me up, but this one did! Rest assured, I shot all 10 seconds of this blank shot like the others (and the HV30 still worked after I was done). This setting must work better in low-light, high-contrast situations. Again, this is one I’ll have to test under much different conditions.

Next time, the histograms of these pics to see what exactly the HV30 did for each mode.

Tuesday, February 17, 2009

The HV30 Recording Programs, Part 2


Continuing from last week, here are the histograms for the HV30 program mode tests. I used the same TIFF files as last time, loading them into Photoshop. The histograms are screen captures from Photoshop.

I had to head to Wikipedia to figure out how to read these graphs, so I'm relying on the information there being accurate! The top row (in black) shows the luminosity for each setting, with the left side being the darkest and right the brightest. The higher the peak, the more pixels there are in the image at that particular luminance.

The colour graphs show the locations of the RGB pixels, with the darkest values on the left and the lightest values on the right. Therefore, a white pixel will appear on the far right side of all four graphs, and a black pixel will appear on the far left of all four.

The overall shape is roughly the same for each program setting, with that somewhat phallic peak in the centre or to the right of the centre, but there are some significant differences between them.

In the Program AE mode, where the HV30 has complete control over the shutter and aperture settings, the camcorder spreads the phallus into three distinct columns for luminosity reading, and adds a peak to the right side where the other settings have a slight bump.

The Av and Tv histograms are nearly identical, so I’ll need to do more testing. I have read opinions favouring shutter or aperture control for shooting quality video, so this bears further testing to see what works best with the HV30 in a wider range of tests.

The Cine Mode setting shows the most differences between itself and the other three programs. This mode really clamps down on the brightest 1/3 of the luminosity and the three colour channels. The lower end, the blacks, is also a bit different—the little spikes, particularly in the blue channel, are compressed compared to the other graphs. Where Cine Mode boosts the image is the mountain to the left of the phallus—all four readings are higher there than the other three program settings. This finding matches what I've read about how the film-look settings on camcorders work to match how film captures luminosity and colour.

This round of test shows what the four program settings can do. I can see that the Cine Mode is significantly alters the image, so I will definitely pursue further testing with these settings in other conditions, particularly the Tv and Av modes. I don't know if the Cine Mode's changes can be reversed in post, so I want to see if another mode provides a better canvas to do colour-correction in post.

Next week, the special scene recording programs.

Wednesday, February 4, 2009

The HV30 Recording Programs, Part 1


It was warm enough outside this weekend, finally, to take the HV30 out and shoot some stuff. I really haven’t had much opportunity to use the HV30 so far this winter as we’re not shooting anything right now and the weather’s been cold and snowy on the weekends.

The first thing I did was play with the recording programs, so this week’s missive is devoted to seeing what they do.

I put the HV30 into the default HDV 1080 60i recording mode for all of these tests, and I went to a small park covered with snow (with a busy street in the background to give some contrast to the snow). I even found an angle that put some shadows on the snow, just for detail. Then I shot just 10 seconds at each setting to minimize the effect of the sun moving west (I had some tall apartment buildings behind me, so I had to hurry to avoid the long shadows that were creeping in from left of the frame). I put the camera facing north-north-east, so the sun is almost directly behind the camera.

For the screen caps below and in the subsequent tests, I captured the footage using Final Cut Pro, and then exported them as TIFs. I captured using the HDV 1080 60i settings. From there, I put them in Photoshop and used the Save for Web option to convert them to JPEGs, using the ICC medium JPEG setting. I think I minimized the changes to colour, contrast, etc., that file conversion would have brought about.

The HV30 comes with four recording programs (Program AE, Shutter Priority, Aperture Priority, and Cine Mode). First, the Program AE mode, in which the HV30 has control of both the shutter and aperture. This is the point-and-shoot mode:

Program-AE-mode
I consider this the baseline since the HV30’s brain is doing all the work. This is what the Panasonic engineers came up with in terms of the optimum exposure settings. There’s not a lot of red, other than the brown brick building to the left and the yellow fire hydrant in the right-centre, so I think the blue channel is probably doing most of the work in this shot. The white snow across the street, in direct sunlight, is pure white here, and the snow and sign in the foreground both look white. And the blue sky is just as blue as it was on the day.
Next, the Tv mode, where the shutter speed is manual and the aperture is controlled by the HV30. In this case, the shutter speed was at 1/100:

Program-TV-shutter
The blue sky looks bluer here, but I can’t really see a difference between this image and the Program AE image.
Next up, the Av mode, where the aperture is manual and the camcorder controls the shutter. I didn’t change the aperture value when I switched from Tv to Av, and I didn’t write down what the aperture setting was, so I don’t know what the aperture was actually set at! At any rate, here’s what it looks like:
Program-AV-aperture
It’s pretty much identical to the Tv mode, so the camcorder didn’t change anything when I went from one setting to the other. I am planning on testing the Tv and Av modes more extensively later on.
Finally, here’s the Cine Mode still. This setting has no manual controls, so the HV30 is doing all the work here but trying to give the image a film-like exposure:
Program-Cinemode
It looks a bit darker, and the snow in the forground looks more grey than blue compared to the previous screen caps. The contrast seems to be compressed a bit—the whites are less bright and the darks are less dark. The colour of the fire hydrant across the road looks the same, but the blue sky is definitely a different tone than the earlier settings.
I will post histograms of these four images next time, just to see what exactly the differences are.

Monday, November 3, 2008

The New Camcorder

And the winner is….

I went with the HV30, the front-runner of my little contest. The DV Shop had the best price I’ve seen (and I’ve bought a lot of stuff from them in the past and I like the store).

I would have shot an unboxing video… if I’d had anything to shoot with. I got the camcorder home, unpacked it (everything that was supposed to be in the box was, happily, there), installed the battery, and left it to charge overnight.

The HV30 battery is a different beast than the Ultura’s battery, so I won’t be able to carry over the old batteries, which still provide me with many hours of power after nearly 9 years of use. When I buy extra batteries for the HV30, I hope they last as long as the Ultura's did!

On the other hand, the HV30’s 43mm lens threading allows me to carry over a few things. My 46mm Canon wide-angle and telephoto lenses will fit on the HV30 once I get the proper 43/46 stepping ring (I’d been using a 27.5/46 stepping ring for the Ultura). And I’ll still be able to use Cokin filters, once I replace the filter-holder ring with a 43mm ring, so I'll be able to use my circular polarizer (the HV30 has neutral density filters built in, but I can add extras as needed).

After setting the date, time, and time zone (all the North American zones represented by American cities, so my HV30 thinks it’s in New York!), I set out to test it. I was looking for something with a lot of movement to better compare 24p, 30p, and the 1080i modes, so I went over to Yonge Street and shot from Beltline bridge overlooking the subway and Yonge.

I brought the manual to figure out where settings were hidden in menus to get started, but the camera is well designed, and I had no problems figuring how to operate it after reading the manual, particularly the menu items listings.

The manual warned about mixing formats on the same tape, so I put gaps on the tape between the different shots. I let the camera roll during the red light on Yonge so I could get a consistent shot for each to compare, and the subway added movement on the other side of the screen at random moments.

I kept the HV30 in the cine-look recording program for all the shots, as well as the daylight white balance setting (for sunny outdoor shooting), just to make comparing the different formats more scientific. I’ll play with exposure, shutter speed, and other settings in a future outing.

After about a half hour, I’d shot footage in the 24p, 30p, and 1080i HDV formats, and I also shot some standard definition 60i DV as well.

Next time: the first capture.

Wednesday, October 29, 2008

The New Camcorder Search, Part 3

Having spent the last few weeks studying the camcorder market, I realized I had to develop a list of criteria to make the decision to buy a new camcorder. The falling Canadian dollar also became a factor—with retail prices on electronics undoubtedly to rise as a result, I had to decide sooner rather than later. So… here are the four main criteria in my decision-making:
1. Mini-DV format
2. Firewire/IEEE1394 equipped
3. Final Cut Studio compatible.
4. HD and SD capable

Compression is the main factor behind the first two items. Mini-DV and Firewire are still the best in terms of the least amount of compression applied by the camcorder or computer. Hard drive, DVD-RAM, and flash memory camcorders use higher compression than mini-DV cameras, so tape still wins (until I can afford those fancy P2 card systems). USB-2 is faster than USB, but it’s still not as good as Firewire. I’d rather not add additional compression by using a slow transfer bus.
The third criteria is dictated by the computer I’m using for post-production. I’m not upgrading from Final Cut Studio 1 as explained in an earlier post, so the camcorder has to work with it and the G5. From what I’ve read on various websites and forums, as long as you correctly tell Final Cut what kind of footage you’re uploading, it should be able to accept any SD or HDV camcorder. Mini-DV cams record video as 60i even in 30p or 24p format, but FCS can handle the various pull-down ratios. Most of the problems I’ve read about on the HV20 User and other forums are related to people not setting the right format before attempting to capture. And Adobe AfterEffects has some additional capacity for dealing with pulldown ratios if Final Cut can’t.
Finally, with HD becoming so prominent in broadcast, online, and home entertainment video, the smart choice is to buy an HD camcorder. I still need something that can play SD video for the projects already shot on SD. So it has to be a dual-format camcorder.
Other factors, although not critical, are related to the fact that I’m replacing a camcorder. I don’t think Canon has changed the form factor of their batteries, so my still-good Ultura batteries could be carried over to another Canon (this, of course, gives a boost to the HV30). An XLR mike input would be really nice having used an inline transformer with the Ultura for all this time. And if the new camcorder fits in my camcorder bag, I’ll be happy.
Next week, the decision and the purchase

Tuesday, October 21, 2008

The New Camcorder Search, Part 2

There are only a few companies that make camcorders these days. I’ve used Canon and Panasonic, and I have only passing use of JVC or Sony camcorders.
A near clone of the HV30 is Sony’s HDR-HC9. Sony has been competing head-to-head with Canon for this HD prosumer market for a couple of years—the HC9 is the successor to the HC7 just as the HV30 is to the HV20. The Sony and Canon camcorders look so similar you need to see the manufacturer’s logo to figure out which one is which--both Sony and Canon made this year’s camcorder in black after making both predecessors in grey last year. I smell corporate espionage….
The first place I went to for research for all the camcorders was http://www.camcorderinfo.com/. This page offers thorough reviews of all major features, and it tests the important stuff—how well the camcorder processes image, colour, etc. In the HC9 review, it compares the HC9 to the HV30, giving the Sony the edge for durability and ease of operation, but gives the Canon the thumbs up for performance and features. I’m prepared to sacrifice ease of operation for performance and features, particularly 30p, so at this point, I was leaning towards the HV30.
Camcorderinfo.com pointed me towards the current JVC and Panasonic models, so I scanned through them to pick out the prosumer products in their lines. JVC doesn’t produce prosumer or even high-end consumer mini-DV camcorders anymore, so they’re out of the running.
The Panasonic model is the PV-GS500, successor to the popular GS400. Physically, it resembles the Sony and Canon models closely—the industry seems to have settled on a specific form factor for palmcorders after 30 years of development. The GS500 is a 3-chip CCD camera, as opposed to a CMOS like the other two, and it has a real live focus ring instead of a sliding switch of some sort (the GS500 has a sliding switch for the zoom, though), although the ring is not marked to indicate settings. In terms of performance, the GS500 does well in various lighting conditions, and the full range of manual settings makes it a compelling option.
I’ve decided to seek out the HV30, the HC9, and the GS500 in retail showrooms to play with them as well as searching the web for more reviews (and prices!).
Next week, the decision-making process.

Wednesday, October 15, 2008

The New Camcorder Search, Part 1

My needs for a new camcorder are simple: I need mini-DV so that I can recapture stuff I’ve already shot, and I want to continue to use mini-DV tapes as that format still offers less compression than consumer-grade hard drive and DVD-burning camcorders.
The leader of the camcorder pack, out of the gates, is the Canon HV30. This is the successor model to the HV20, the camcorder that brought great excitement and joy to the indie filmmaking scene when it came out in 2007. The HV20 offered, for the first time, a decent HDV camera for less than $1000 USD. The HV30 ups the ante by offering 30p as well as the two formats the HV20 offered (24p and 1080i).
I wasn’t aware of what a CMOS camcorder was prior to the HV20’s arrival, but the image quality is high enough to offer HD capability, something I haven’t worked with yet.
Naturally, the first question is whether or not the HV30 will work with my Mac. I have a 1.6 GHz G5 equipped with Mac OS 10.4 (Tiger) and Final Cut Studio 1, and I don’t anticipate upgrading to anything any time soon. My Mac had no problems capturing 24p shot from Panasonic DVX100 and DVX100A cameras we’ve used, so the next step is to see if FCS 1 can cope with whatever pull-down process the HV30 uses for 24p.
The HV30 comes with a Firewire-400 (IEEE 1394) port (as well as USB-2, HDMI, and component video, and composite video ports), so it’s not a problem getting the signal from the camcorder to the computer. The question is, of course, whether or not the computer and the camcorder speak the same language.
Next time, the other camcorders in the running.