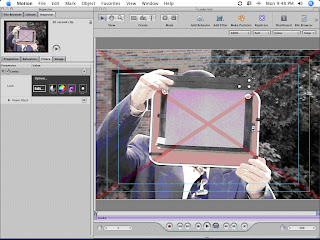
Magic Bullet Looks is pretty easy to use. I downloaded the Motion plug-in version, so I don't know how the Final Cut or other versions work compared to this one. I plopped my test clip into the Motion project, opened the library tab to find the Looks filter (not under 3rd party filters, but under Filters/Magic Bullet). I dragged the filter to the clip and it’s ready to work:
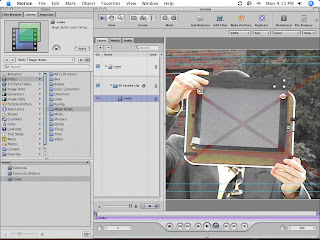
The red X is the demo’s reminder that I haven’t paid for this yet, but you get all features enabled in the demo, which is nice--I've always disliked feature-disabled demos.
I clicked on the Inspector tab and pressed the big edit button to open the interface, which opens a separate app named LooksBuilder. This is a really nice interface, easy on the eyes, and clearly designed by people who do this type of work:
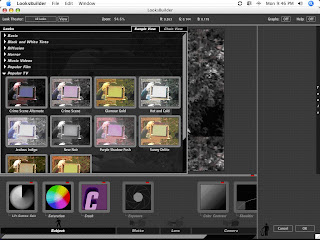
By moving the cursor over the Looks tab on the left side, you get 10 categories of different looks (Basic, Black and White Tints, Diffusion, Horror, Music Videos, Popular Film, Popular TV, Special Effects, Stock Emulation, and Tints). To apply a look, you open the category arrow and click on the specific look. Here I’m picking Crime Scene so that my sunny outdoors clip looks like it’s a crime scene in Vegas.
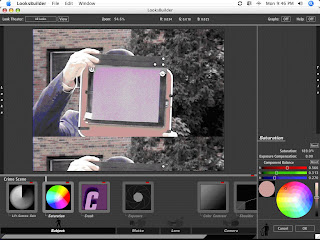
Once applied, you can tweak to your heart’s content, with Lift-Gamma-Gain, Saturation, Crush, Exposure, Color Contrast, and Shoulder being your tools. I’ve picked Saturation here, and a colour wheel and sliders pops up.
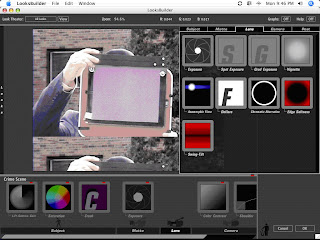
But wait—there’s more! By clicking on the tools at the bottom, you can open the tab on the right side of the screen for more tools I’ve ever seen before. Here is the Matte tab, with 22 tools on it alone. This is where the hardcore tweaking takes place. As I’m not a colour-correctoin or video expert, I’m not going to get into the nuts and bolts here as I’d need too many words and time to stumble through their use. Suffice it to say, there’s a lot of things you can do to your video here.
Clicking on OK takes you back to Motion, with all the tweaks you’ve made added to your clip as an easily reversible or deleteable sub-layer.
I spent the longest time trying out the different looks and a little bit of time playing with the tools, but I’m way over my head with this stuff. I’ve got a book on colour correction that I’ll blog about later on, once I get my feet wet with this type of pixel-pushing.
Overall, I’m really impressed with Magic Bullet Looks. It’s easy to use yet provides you with a lot of tools to do some hardcore work. For a no-budget filmmaker like me who is more interested in the writing and acting end of things, this plug-in is certainly an easy way to look good on video.
At some point, after I’ve looked at the other software in my 2008 Roundup, I’ll post some video created with each program as these stills aren’t offering a lot of detail on how the video looks when it’s actually playing….

But wait—there’s more! By clicking on the tools at the bottom, you can open the tab on the right side of the screen for more tools I’ve ever seen before. Here is the Matte tab, with 22 tools on it alone. This is where the hardcore tweaking takes place. As I’m not a colour-correctoin or video expert, I’m not going to get into the nuts and bolts here as I’d need too many words and time to stumble through their use. Suffice it to say, there’s a lot of things you can do to your video here.

Clicking on OK takes you back to Motion, with all the tweaks you’ve made added to your clip as an easily reversible or deleteable sub-layer.

I spent the longest time trying out the different looks and a little bit of time playing with the tools, but I’m way over my head with this stuff. I’ve got a book on colour correction that I’ll blog about later on, once I get my feet wet with this type of pixel-pushing.
Overall, I’m really impressed with Magic Bullet Looks. It’s easy to use yet provides you with a lot of tools to do some hardcore work. For a no-budget filmmaker like me who is more interested in the writing and acting end of things, this plug-in is certainly an easy way to look good on video.
At some point, after I’ve looked at the other software in my 2008 Roundup, I’ll post some video created with each program as these stills aren’t offering a lot of detail on how the video looks when it’s actually playing….