
It was warm enough outside this weekend, finally, to take the HV30 out and shoot some stuff. I really haven’t had much opportunity to use the HV30 so far this winter as we’re not shooting anything right now and the weather’s been cold and snowy on the weekends.
The first thing I did was play with the recording programs, so this week’s missive is devoted to seeing what they do.
I put the HV30 into the default HDV 1080 60i recording mode for all of these tests, and I went to a small park covered with snow (with a busy street in the background to give some contrast to the snow). I even found an angle that put some shadows on the snow, just for detail. Then I shot just 10 seconds at each setting to minimize the effect of the sun moving west (I had some tall apartment buildings behind me, so I had to hurry to avoid the long shadows that were creeping in from left of the frame). I put the camera facing north-north-east, so the sun is almost directly behind the camera.
For the screen caps below and in the subsequent tests, I captured the footage using Final Cut Pro, and then exported them as TIFs. I captured using the HDV 1080 60i settings. From there, I put them in Photoshop and used the Save for Web option to convert them to JPEGs, using the ICC medium JPEG setting. I think I minimized the changes to colour, contrast, etc., that file conversion would have brought about.
The HV30 comes with four recording programs (Program AE, Shutter Priority, Aperture Priority, and Cine Mode). First, the Program AE mode, in which the HV30 has control of both the shutter and aperture. This is the point-and-shoot mode:
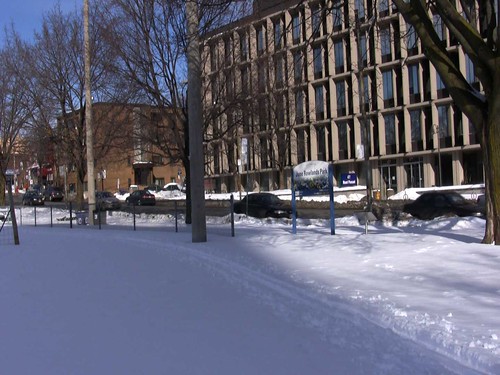
I consider this the baseline since the HV30’s brain is doing all the work. This is what the Panasonic engineers came up with in terms of the optimum exposure settings. There’s not a lot of red, other than the brown brick building to the left and the yellow fire hydrant in the right-centre, so I think the blue channel is probably doing most of the work in this shot. The white snow across the street, in direct sunlight, is pure white here, and the snow and sign in the foreground both look white. And the blue sky is just as blue as it was on the day.
Next, the Tv mode, where the shutter speed is manual and the aperture is controlled by the HV30. In this case, the shutter speed was at 1/100:
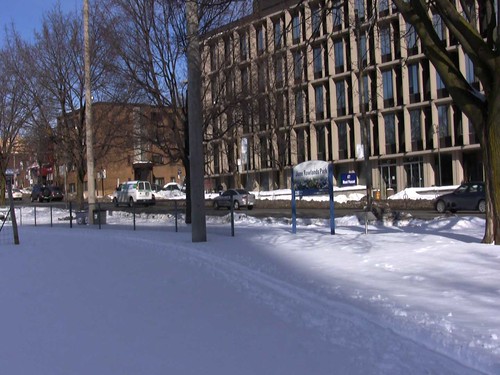
The blue sky looks bluer here, but I can’t really see a difference between this image and the Program AE image.
Next up, the Av mode, where the aperture is manual and the camcorder controls the shutter. I didn’t change the aperture value when I switched from Tv to Av, and I didn’t write down what the aperture setting was, so I don’t know what the aperture was actually set at! At any rate, here’s what it looks like:
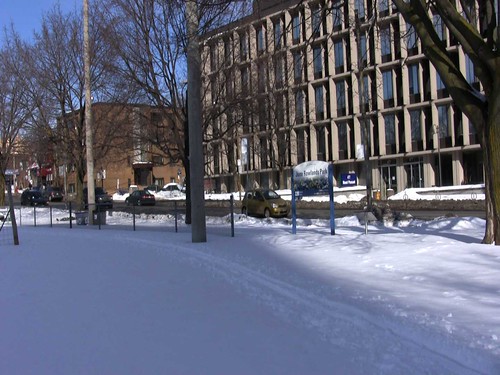
It’s pretty much identical to the Tv mode, so the camcorder didn’t change anything when I went from one setting to the other. I am planning on testing the Tv and Av modes more extensively later on.
Finally, here’s the Cine Mode still. This setting has no manual controls, so the HV30 is doing all the work here but trying to give the image a film-like exposure:
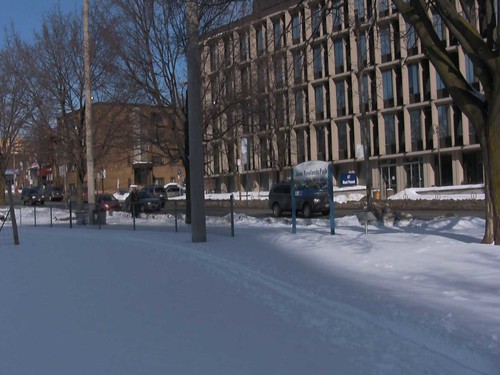
It looks a bit darker, and the snow in the forground looks more grey than blue compared to the previous screen caps. The contrast seems to be compressed a bit—the whites are less bright and the darks are less dark. The colour of the fire hydrant across the road looks the same, but the blue sky is definitely a different tone than the earlier settings.
I will post histograms of these four images next time, just to see what exactly the differences are.
Next up, the Av mode, where the aperture is manual and the camcorder controls the shutter. I didn’t change the aperture value when I switched from Tv to Av, and I didn’t write down what the aperture setting was, so I don’t know what the aperture was actually set at! At any rate, here’s what it looks like:
It’s pretty much identical to the Tv mode, so the camcorder didn’t change anything when I went from one setting to the other. I am planning on testing the Tv and Av modes more extensively later on.
Finally, here’s the Cine Mode still. This setting has no manual controls, so the HV30 is doing all the work here but trying to give the image a film-like exposure:
It looks a bit darker, and the snow in the forground looks more grey than blue compared to the previous screen caps. The contrast seems to be compressed a bit—the whites are less bright and the darks are less dark. The colour of the fire hydrant across the road looks the same, but the blue sky is definitely a different tone than the earlier settings.
I will post histograms of these four images next time, just to see what exactly the differences are.
No comments:
Post a Comment